 Copyright Infinitybox, LLC 2021. All Rights Reserved.
 Mounting Cells
So, here’s where we are in the wiring process for our customer’s 1967 Mustang. They mounted the primary fuses and ran power from the battery. Now it is time for mounting cells in the car. They are using our 20-Circuit Harness kit, which includes one MASTERCELL and two POWERCELLs. The MASTERCELL connects to the switches in the car (ignition, starter, turn signals, lights, cooling fan sensor, etc.). The POWERCELLs are where the power comes from to turn on the powered things like the ignition, starter solenoid, turn signals, lights, cooling fan and other accessories.
The Infinitybox system works differently from other wiring harnesses. With a traditional wiring harness, you have one box with fuses and relays in the center of the car with wire flowing everywhere from this center point. With the Infinitybox system, you distribute the wiring through the car. This lets you put the power distribution where you need it to keep the runs of wire short.
The MASTERCELL is going to connect to all of your switches. Most of these are located around the steering wheel. That is where you are going to want to mount it. There are two POWERCELLs in this kit. One for the front of the car and one for the rear. You want to mount these POWERCELLs near the things that you are turning on and off. This keeps the runs of wire short and makes installation easier in the car.
We always suggest that customers start by walking around the car and make a list of the switched electrical functions in the car. Our configuration sheets are a great planning tool for this. This link will take you to the standard Front-Engine configuration that is our most popular. Outside of the normal things like lights, ignition, turn signals, fuel pumps, horns and fans, think about the other things that need switched power like amps, extra lights, transmission controllers and other custom features.
Each cell has 4 mounting points in the corners of the housings. These are designed for a 1/4″ bolt. Our preferred mounting method is to use a 1/4″ X 5/8″ shoulder screw. The advantage with a shoulder screw is that you can’t over tighten the screw and crush the mounting point. If you are using a traditional bolt, take care not to over-tighten it and crush plastic collar.
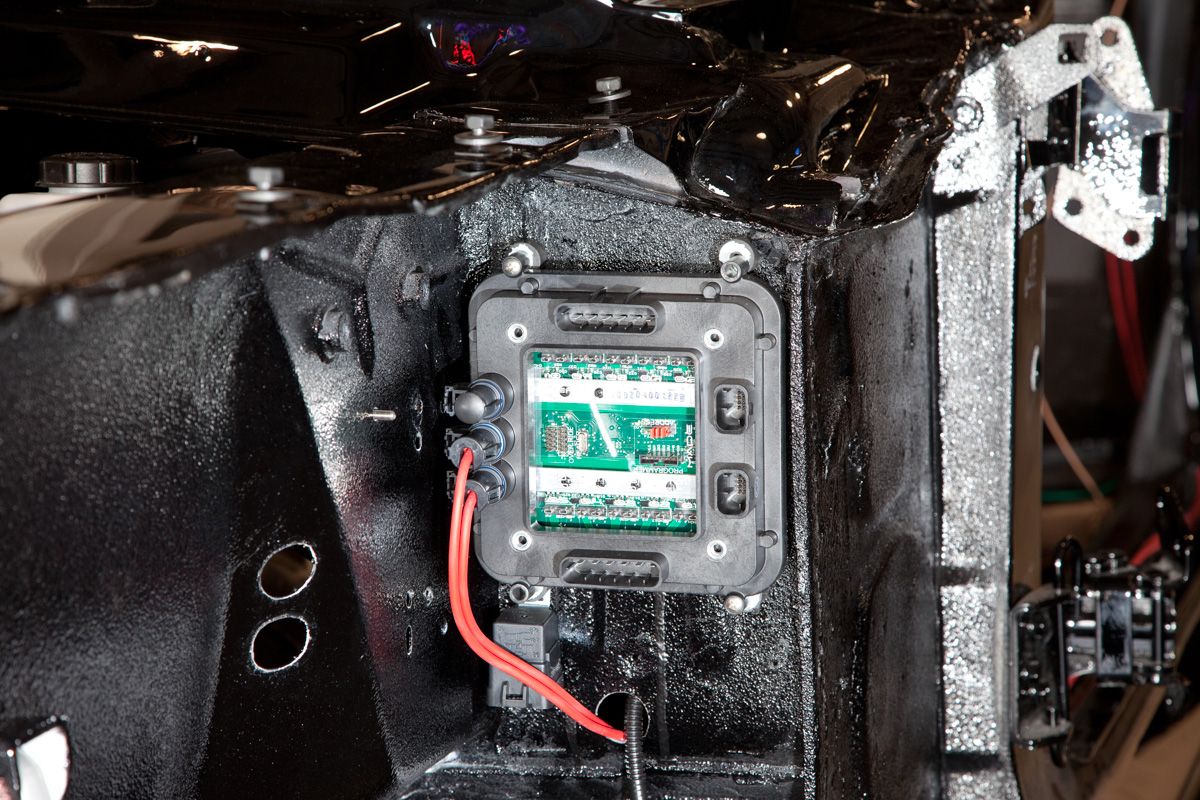
Here are few things to consider when mounting cells. For the easiest install, you want your MASTERCELL to be as close to the switches as possible. You can mount your MASTERCELL in the glove box, in the center console, behind, the dash or behind a kick panel. In the case of this 1967 Mustang, the customer mounted the MASTERCELL above and to the left of the pedal box. Here’s a good picture.
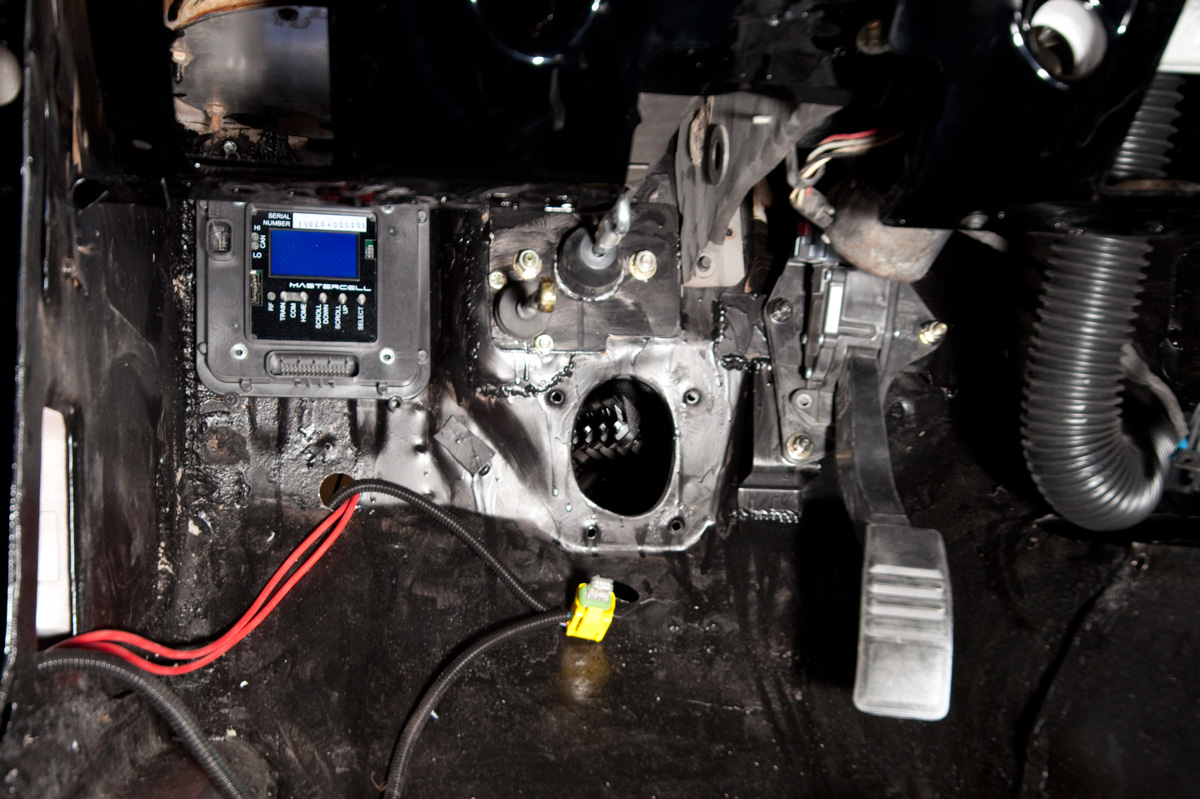
Infinitybox MASTERCELL mounted next to the pedal box in a 1967 Mustang Resto Mod
This location is out of the way but still gives them easy access to the MASTERCELL. The screen on the MASTERCELL is a very important diagnostic tool in the system. You won’t need to get to this often, but you want to make sure that you can get to it when you need it. Also if you have our inLINK radio, the antenna is in the MASTERCELL. You want to make sure that it isn’t buried in the car to get the most range on the key fobs. There are really no other things to worry about when mounting the MASTERCELL outside of keeping the CAN cables and input wires away from the high-voltage wires on your ignition system. This is true for any piece of electronics in the car, not just your Infinitybox hardware.
The input wires from the MASTERCELL will connect this cell to all of the switches in the car. We’ll cover that part in later parts of this install series.
The POWERCELLs are next. You want to put these close to the things that you are powering. In the case of the front POWERCELL, this includes your dash power, ignition, starter solenoid, head lights, high-beams, turn signals, running lights, horn and cooling fan. In the case of the rear POWERCELL, this includes the tail lights, brake lights, fuel pump, reverse lights, turn signals and audio in the trunk. Remember that your POWERCELLs contain the fuses that protect the wires in your harnesses. You want to have easy access to these cells in case one of these fuses opens. There are also diagnostic indicators on the POWERCELLs that give you a wealth of information about how the system is operating. You want to have good access to the cell to see these indicator lights.
The customer mounted the rear POWERCELL in the driver’s side corner of the trunk. Here’s a good picture.
Rear POWERCELL in trunk of 1967 Mustang wired with the Infinitybox system.
They fabricated a mounting plate to support it nicely. Here’s a close up shot of the cell and the mounting plate.
Rear POWERCELL mounted in 1967 Mustang wired with the Infinitybox system.
This POWERCELL will be hidden behind a trim panel in the trunk. From this location, the runs of output wire to the turn signals, brake lights, fuel pump and running lights is very short and easy to install.
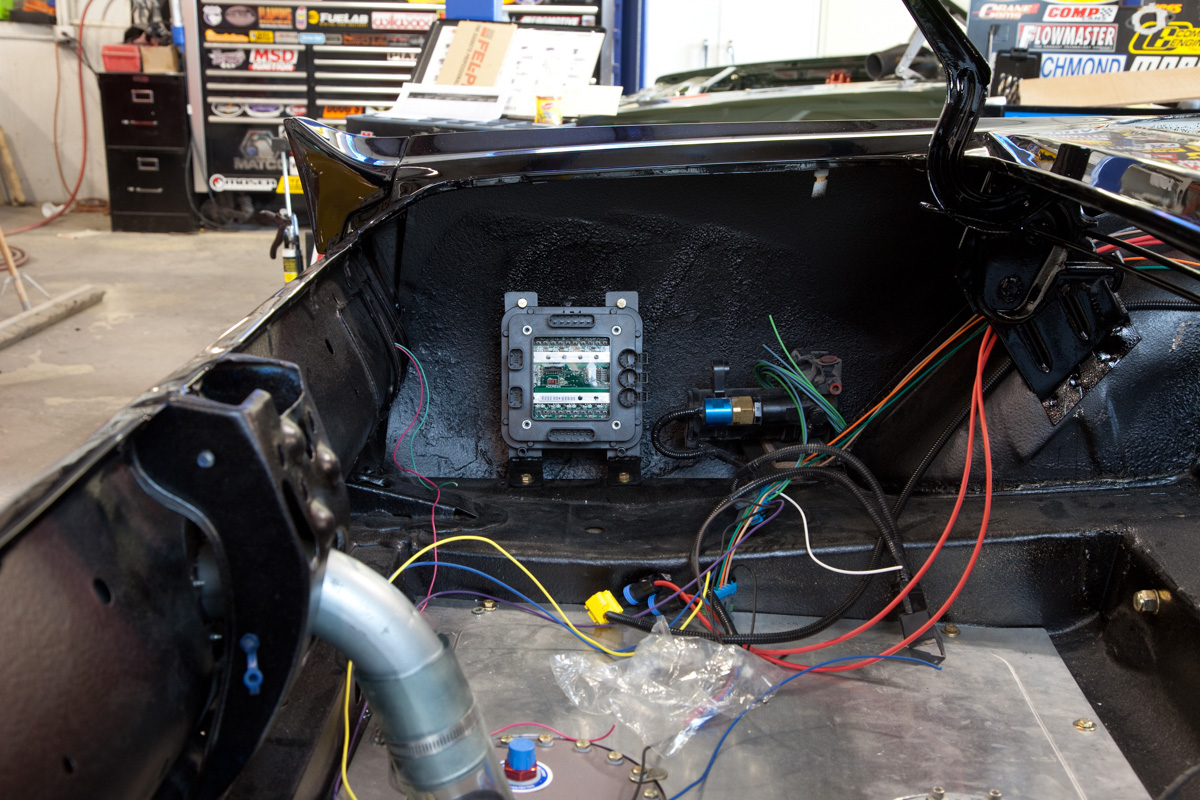
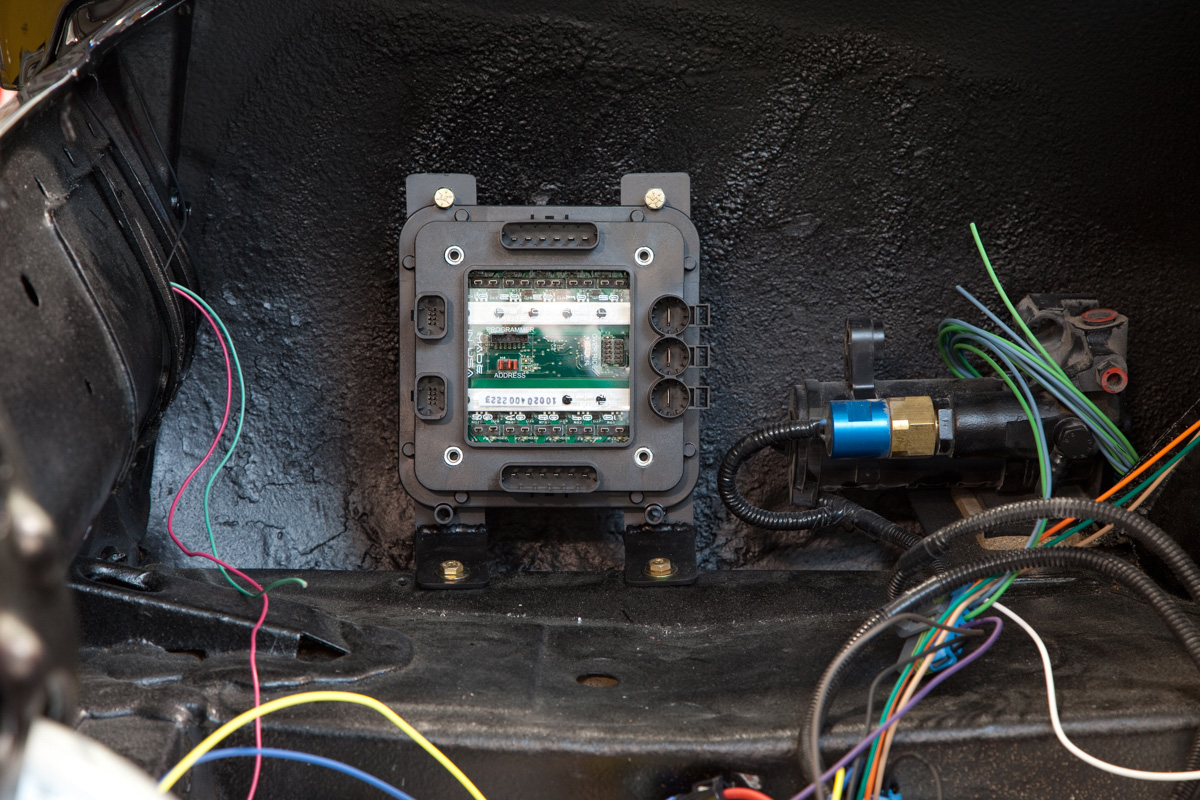
This customer did something unique in their mounting of the front POWERCELL. They wanted a completely clean engine compartment so they mounted the POWERCELL behind the driver’s fender. See this picture.

Location of front POWERCELL in 1967 Mustang wired with the Infinitybox system.
They fabricated a sealed door inside the wheel well. They can turn the wheels to the left, open the panel and get easy access to the POWERCELL if they need. Here’s a closer shot of the mounting location.
Front POWERCELL Mounted in 1967 Mustang
This location gives them very short runs of wire from the POWERCELL to their ECU, starter solenoid, lights, turn signals, cooling fan, horn and dash power.
Depending on your car and your project, you can mount the POWERCELLs practically anywhere in the car. The cells are rated to 125 degrees Celsius (260 F). This means that you can mount them under the hood. They were designed and tested to survive the temperature, shock and chemical exposure of the under-hood environment. Like the MASTERCELL and any other piece of electronics in your car, you want to keep them clear of the ignition coils and high-voltage ignition wiring. You also want to keep them out of the direct radiated heat of your exhaust headers.
Now that mounting cells in the car is complete, the next post will cover running primary power from the Mega fuses to the POWERCELLs. Stay tuned for this next post. If you have questions or comments, please click on this link to contact us.

 Copyright Infinitybox, LLC 2021. All Rights Reserved.
  Copyright Infinitybox, LLC 2021. All Rights Reserved.
 Copyright Infinitybox, LLC 2021. All Rights Reserved.