 Copyright Infinitybox, LLC 2021. All Rights Reserved.
 Jeep CJ7 Wiring Series- MASTERCELL Location
Over the next few videos, we’re going to continue our theme on good planning. Specifically, we’re going to talk about picking the best locations for the major components that come with your Infinitybox system. We’re installing our 20-Circuit Kit with inLINK and inRESERVE in our 1979 CJ7. To get the most out of our install, we want to pick the best locations for the MASTERCELL, the front & rear POWERCELLs, the MEGA fuse holder and the inRESERVE solenoid. We’ve broken this up into 5 different videos, talking about what you need to consider for each part. This video covers picking the best location for your MASTERCELL.

The Infinitybox MASTERCELL
The MASTERCELL is the brain of your 20-Circuit Kit. It connects to all of your switches. These include your ignition switch, turn signal stalk, brake pedal switch, headlight switch, fuel pump & cooling fan trigger and any other accessory switches that you may have in your car or truck. The MASTERCELL sends commands to the POWERCELLs when you turn a switch on or off. You can learn more about the MASTERCELL and what it does by clicking this link.
There are two important things to consider when you’re picking the location for your MASTERCELL. First, you want the MASTERCELL as close to your switches as possible. This keeps the wiring short and makes it easy to install. Second, you want to have easy access to the MASTERCELL for troubleshooting and diagnostics. There are tons of diagnostic features built into the MASTERCELL. You can learn about them at this link. To access these features, you need to be able to get to the MASTERCELL, remove the protective cover, press the buttons and read the inSIGHT LCD screen.
In our 1979 Jeep CJ7, we’re going to mount the MASTERCELL in the glove compartment. There is a convenient open pocket behind the door for the glove compartment. This puts the MASTERCELL close to all of the switches on the dash. That will make the dash wiring short and efficient. With the door open, we can easily take off the MASTERCELL cover, press the buttons and read the inSIGHT screen. When we close the door, the MASTERCELL disappears.
This picture will show the location of the MASTERCELL and POWERCELLs in the Jeep and how we routed the CAN cable between the cells.
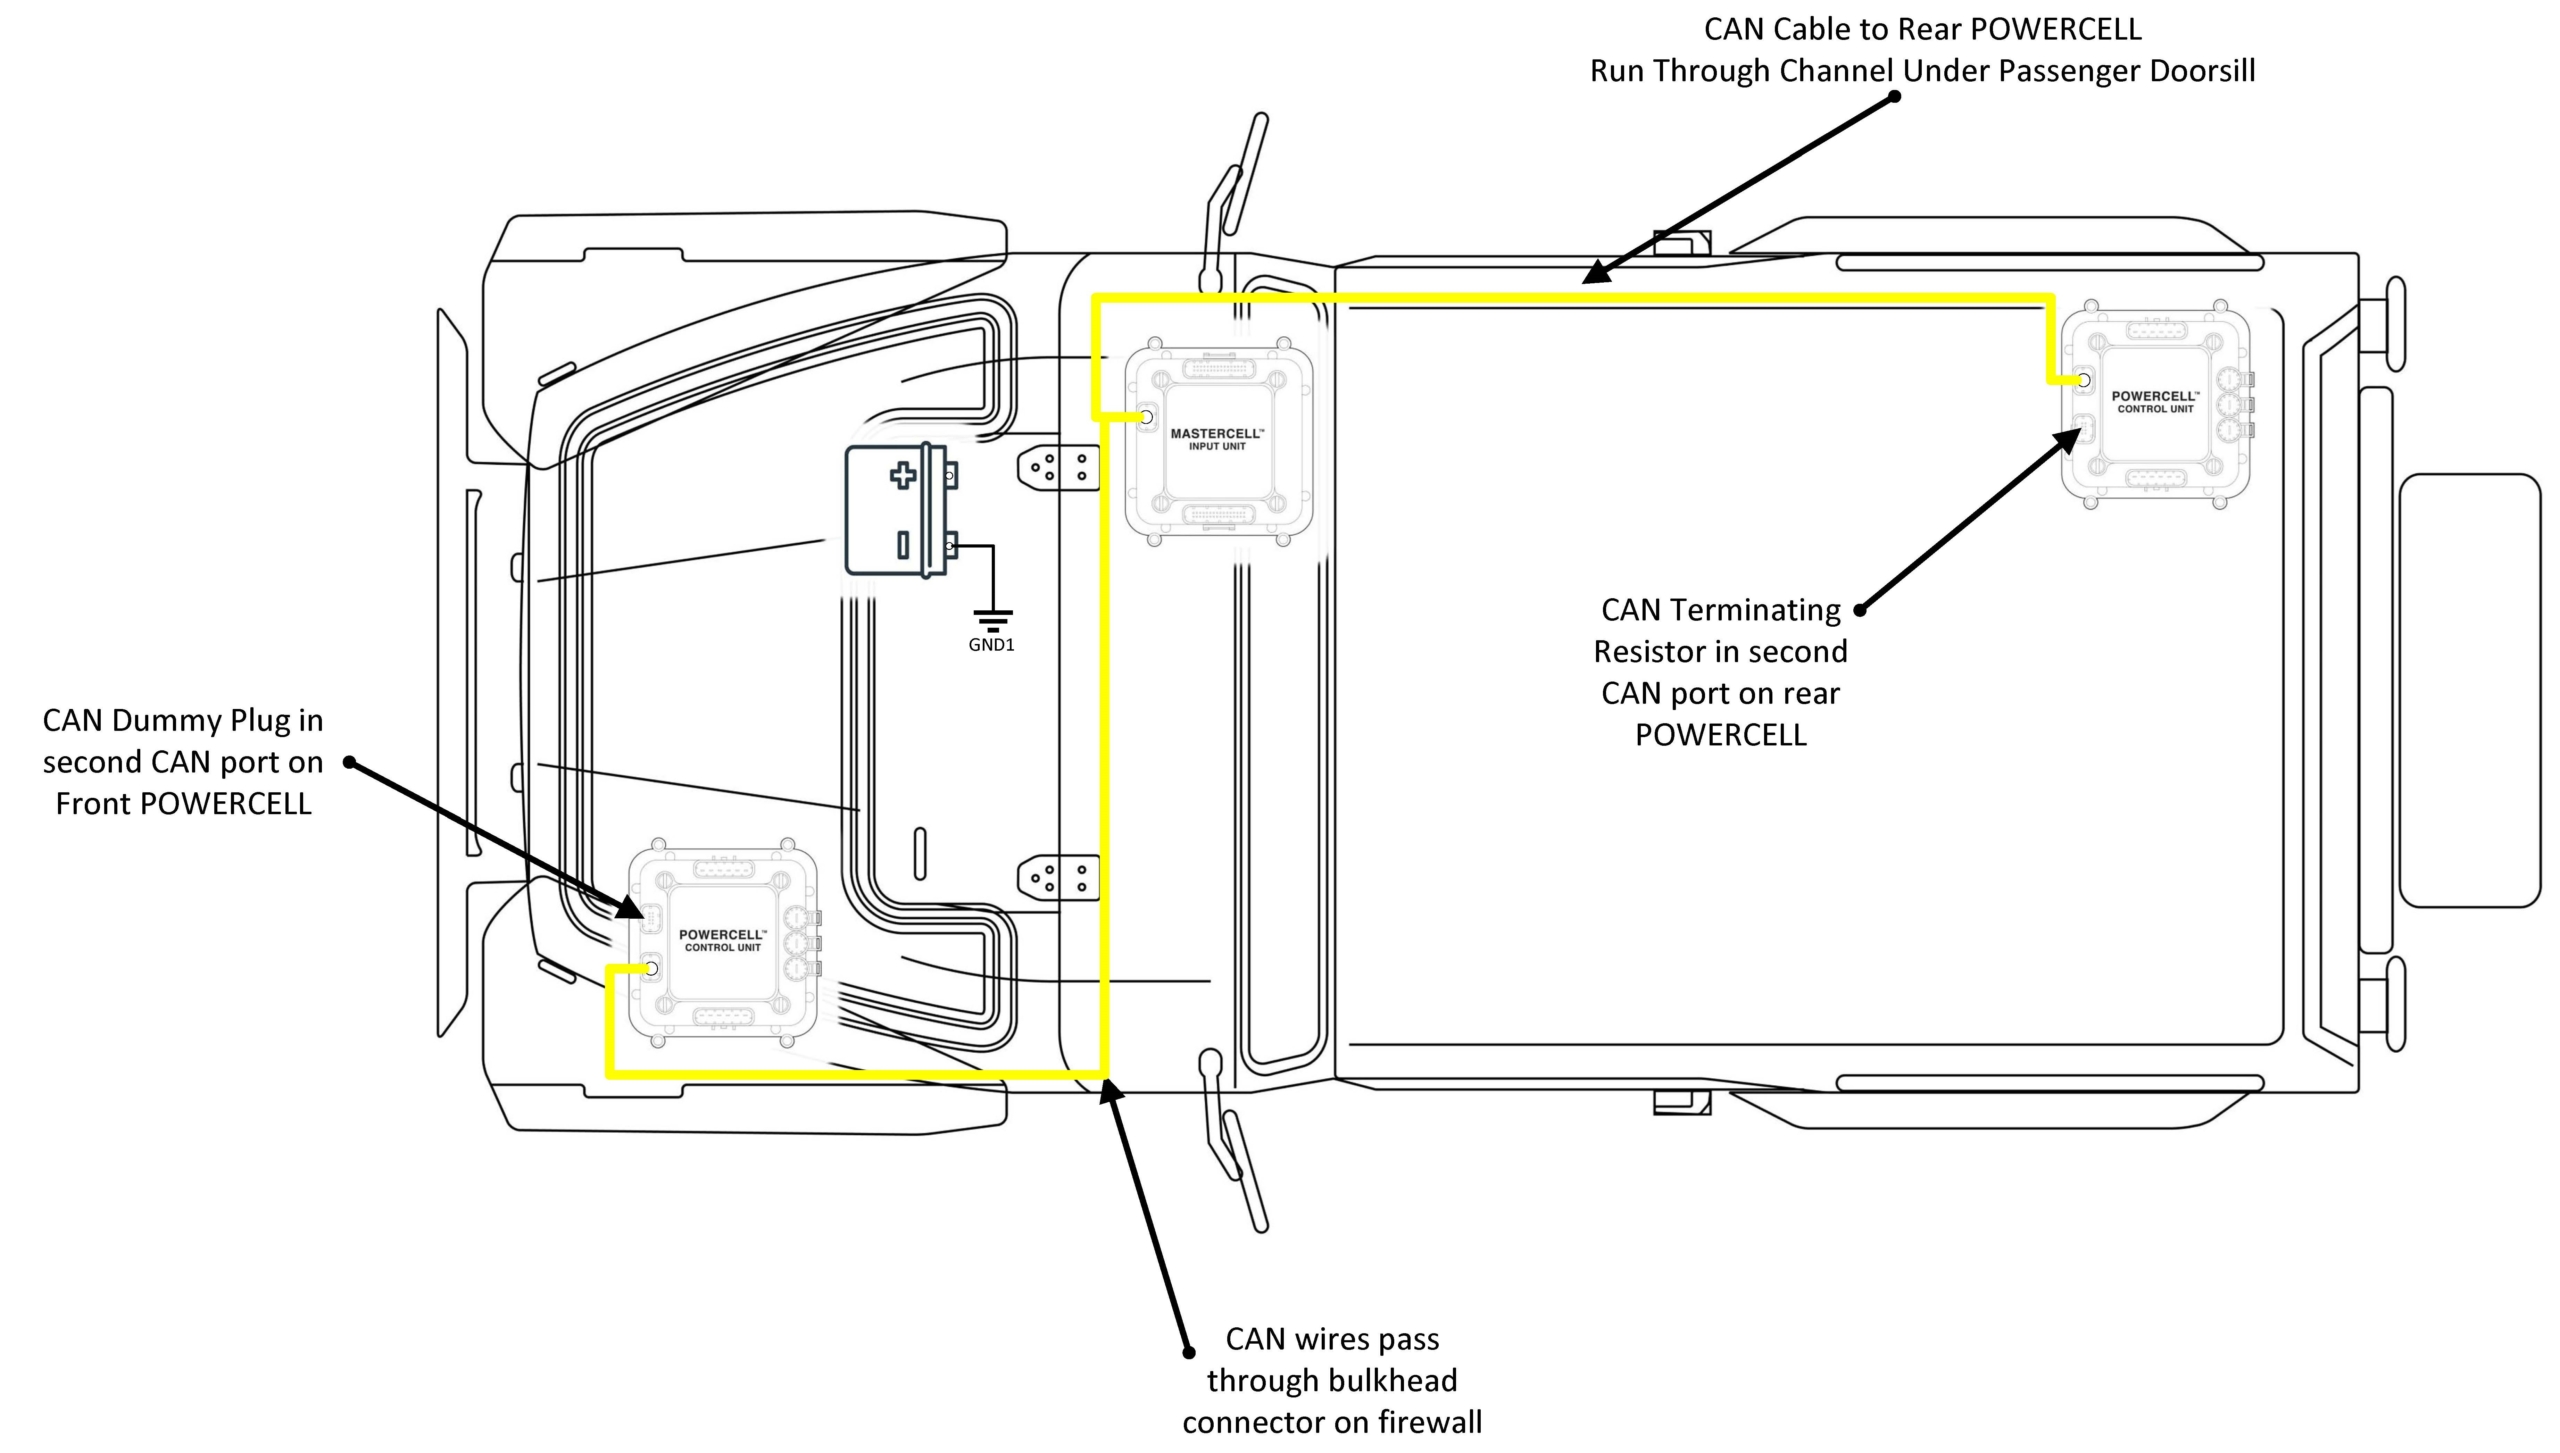
Infinitybox Jeep CJ7 Wiring Diagram- CAN Cable Routing
Picking the best location for your MASTERCELL will make your switch wiring simple and efficient. It will also make troubleshooting and diagnostics easier if you need them. Keep watching for more in our 1979 Jeep CJ7 Install Series.
Be sure to subscribe to our YouTube channel and click the bell icon so you get notified when we post new videos in the series.
 Copyright Infinitybox, LLC 2021. All Rights Reserved.
 Copyright Infinitybox, LLC 2021. All Rights Reserved.