Starter Motor
Next in our wiring series, it is time to wire the starter motor. There are a few important things that need to be considered when you do this. In this post, we are just talking about connecting the POWERCELL output to the starter solenoid. In later posts, we will go through the details for wiring the ignition and starter switch.
There is a dedicated output on the front POWERCELL for the starter solenoid. In most kits it is the light-blue wire, which is output 4 on the B connector. When you turn on the MASTERCELL input for the starter, you get power on this starter wire. This energizes the starter solenoid coil.
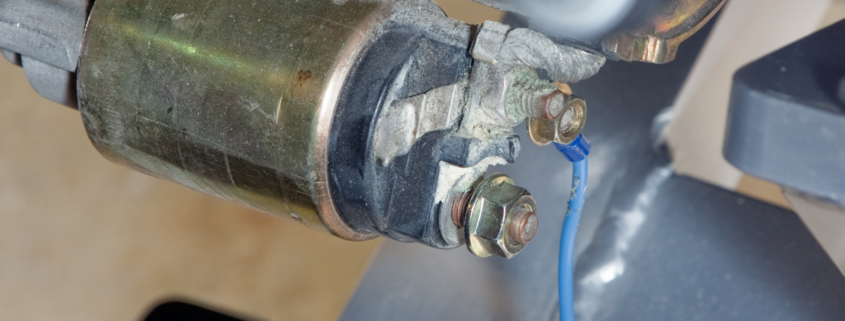
There are two main types of starter motors. Some have the starter solenoid built into them. Others rely on an external starter solenoid. It takes hundreds of amperes to crank an engine. Your battery is the source of this current. It takes a special solenoid to repeatedly switch this high current. A normal relay can’t carry this amount of current. You need a solenoid. This picture shows you the details of a typical starter motor with a built-in solenoid.
The starter solenoid gets a direct connection from the battery. This will supply the starting current when you turn on the starter. There is also a contact on the starter solenoid that connects to the starter output on the POWERCELL. When you turn the key to the start position, battery voltage is applied to this start terminal. This voltage does two things. The solenoid pulls in which pushes the Bendix out to engage with the engine flywheel. It also closes a large set of high-current contacts within the solenoid that lets current flow from the battery to the starter motor. This current spins the motor, which turns the flywheel.
When you release the key from the start position, the battery voltage is removed from the start terminal on the solenoid. This opens the contacts providing current to the motor, so the motor stops spinning. Also, the Bendix retracts from the flywheel.
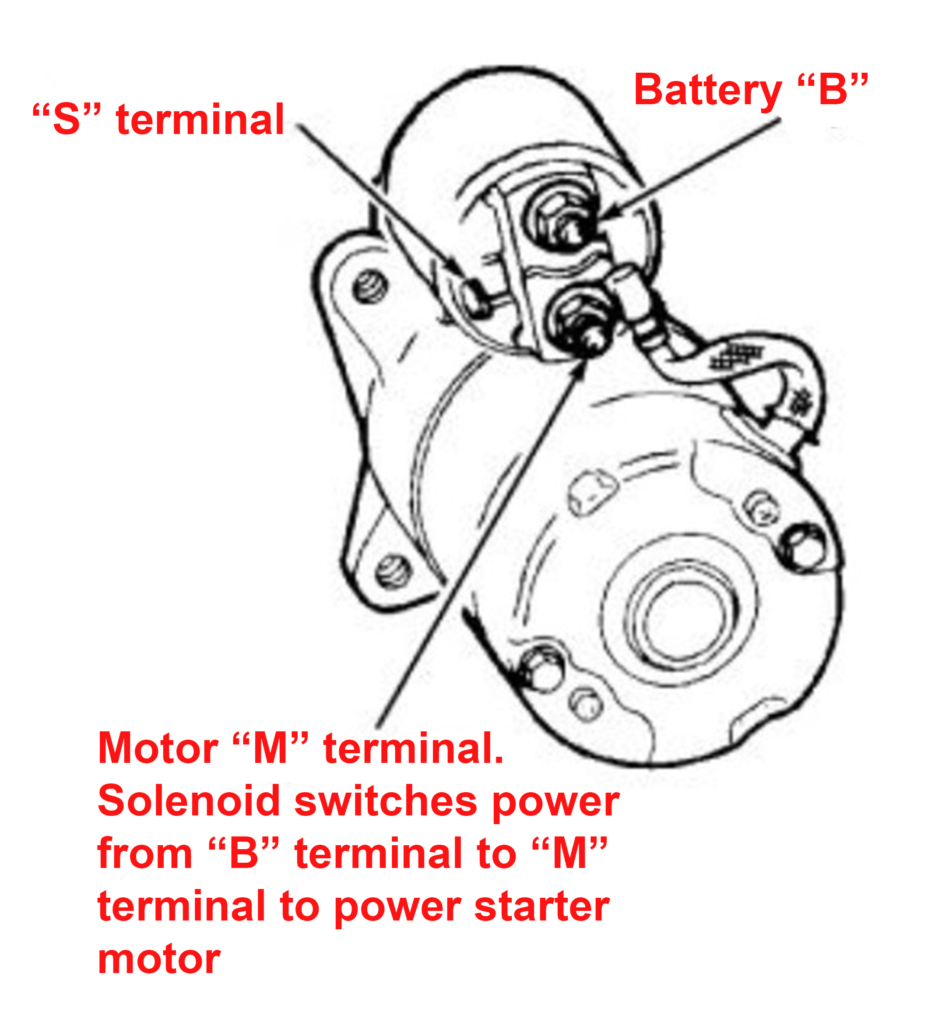
This picture shows a typical wiring diagram for a starter motor with a built-in solenoid.
The B terminal connects directly to the battery. We’ll discuss this in more detail below. The M terminal is internally connected to the windings on the starter motor. The S terminal is what connects to the starter output on the POWERCELL. When there is battery voltage from the POWERCELL on the S terminal, the solenoid engages. The Bendix extends into the flywheel and the B terminal gets connected to the M terminal. This provides the current to turn the starter motor. The starter motor gets grounded to the chassis through its mounting plate to the engine block.
There are other starter motors that do not have the built-in solenoid. They use a different mechanism to extend the pinion into the flywheel. They rely on an external solenoid to switch the current to the starter motor. This picture shows an example of an external solenoid.
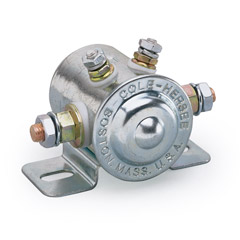
Cole Hersee Solenoid
This external solenoid is what switches the high-current for the starter motor. One of the large terminals connects to the starter motor. The other large terminal connects directly to the battery. Again, we’re going to talk about this battery connection below. One of the small terminals needs to get connected to ground. The other small terminal needs to get connected to the starter output on the POWERCELL. When the POWERCELL applies battery voltage to to the starter terminal, the solenoid closes and lets current flow to the starter motor, which turns the flywheel.
Now it is time to talk about the battery cable. This is what supplies current from the battery to the starter motor. At the instant you close the starter solenoid, the current flowing to the starter motor can be between 1,500 to 2,000 Amps. Once the engine starts to turn, that current will drop down to 200 to 400-Amps. You must make sure that you size this cable appropriately. A lot of guys get cheap with their battery cables and go with smaller gauges. This is a case where the bigger, the better.
We recommend using a 1/0 or 2/0 welding cable to connect the battery to the starter. Smaller cables will result in voltage drop to the starter. Voltage drop will lead to problems starting the engine. Welding cable is much more flexible and easier to work with than typical battery cables. It is easier to route through the car. Please note that we do not include the battery cable or the required ring terminals in our kit. You need to source these separately.
You also need to consider the grounds between the engine block and the chassis. Whatever current flows to the starter has to return to the chassis. You need to have good and large ground straps between the engine block. The size of the ground cables must be equal or greater than the size of the cable you have feeding the starter.
Please click on this link to contact our team with questions about wiring the starter output on the POWERCELL in your 20-Circuit Kit.

 Copyright Infinitybox, LLC 2021. All Rights Reserved.
 Copyright Infinitybox, LLC 2021. All Rights Reserved.
  Copyright Infinitybox, LLC 2021. All Rights Reserved.
  Copyright Infinitybox, LLC 2021. All Rights Reserved.

 Copyright Infinitybox, LLC 2021. All Rights Reserved.
  Copyright Infinitybox, LLC 2021. All Rights Reserved.
Leave a Reply
Want to join the discussion?Feel free to contribute!