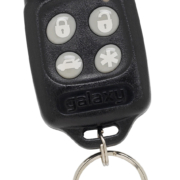
inLINK is one of our most popular accessories for our 10 and 20-Circuit Harness Kits. It gets you a very easy way to add an alarm, security and a vehicle immobilizer to your car. You can either purchase inLINK with your kit up front or you can add at any time down the road. If you add it down the road, you are going to have to follow these instructions for training inLINK. This is a simple process that pairs the remote key fob to the radio in the MASTERCELL.
We use a secure and encrypted system to protect the communication between the key fob and the MASTERCELL. It uses a 64-bit, rolling code encryption scheme. That means that every time you press a button on the fob, it changes the secret password. There are billions of combinations of passwords that make hacking into the transmission practically impossible.
Each of the key fobs included with the inLINK kit has to be trained to the MASTERCELL. If you order inLINK with your 10 or 20-Circuit Harness Kit, we pre-install it and train it for you. If you order this separately, you need to install the radio board and train the key fobs.
This link will show you how to install the inLINK radio board in your MASTERCELL.
Here are the steps to train your key fobs to your MASTERCELL.
- Remove the cover on the MASTERCELL.
- Press and release the “TRAIN” button on the MASTERCELL. You will get a message that will read “To Learn… press any button 2 times”.
- Press the lock button on the key fob once, wait one second and press the lock button on the key fob again. After a few seconds, you will get a message on the screen that reads “Learn Command Accepted”. You may also get a message that reads “Existing Transmitter Overwritten”. In either case, the MASTERCELL and key fob are paired.
- Repeat this process for the second key fob.
Contact our technical support team with any questions about pairing your inLINK key fobs to the MASTERCELL.

 Copyright Infinitybox, LLC 2021. All Rights Reserved.
  Copyright Infinitybox, LLC 2021. All Rights Reserved.