 Copyright Infinitybox, LLC 2021. All Rights Reserved.
 Updating inTOUCH NET with SKII Boards
All of the Infinitybox hardware can be updated in the field. Some of these changes require our inCODE programmer. Some can be done directly from a laptop. Updating inTOUCH NET can be done directly from a laptop with Wi-Fi.
PLEASE NOTE: YOU WILL ONLY HAVE TO GO THROUGH THESE STEPS IF YOU ARE DIRECTED TO DO SO BY AN INFINITYBOX TECHNICAL SUPPORT REPRESENTATIVE!
There are two different versions of our inTOUCH NET. As of January 2017, we moved to the SKII version of our board. If you have an inTOUCH NET from before this date, see this blog post for the updating instructions.
You will receive an email from Infinitybox with the files that you need to load onto your inTOUCH NET. Read through these steps carefully before proceeding. Before starting, these steps must be done on a Windows PC or Laptop with Wi-Fi capability.
- You will receive an email from Infinitybox technical support with the updated files that are specific to your inTOUCH NET. Download these files and save them to a convenient location on your computer.
- Disconnect inTOUCH NET from your Infinitybox system.
- Download http://www.microchip.com/mplabx-ide-windows-installer on your computer.
- After the download is complete, run the installer. When prompted, only install MPLAB IPE, uncheck the box for MPLAB X IDE.
- After MPLAB IPE is successfully installed, reboot your computer.
- After the computer is rebooted, plug the USB cable from inTOUCH NET into your computer. Let it load the drivers. inTOUCH NET is getting its power from the USB connection for this process.
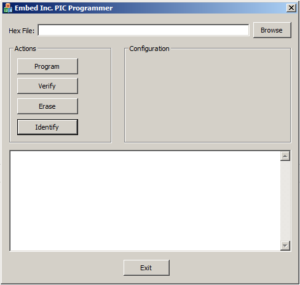
- Launch the MPLAB IPE software, which can found under Microchip/MPLAB X IDE in the start menu or use the MPLAB IPE shortcut on the desktop.
- In the Device drop down menu, select PIC32MX795F512L. Click on the Apply button.
- In the Tool drop down menu select PKOB SKDE if not selected already.
- Click on the Connect button.
- Click browse at the end of the source line and choose the file with the name that ends in .hex. This would be the file that we emailed to you.
- Click program, the output window should indicate “Programing Complete” when finished.
- Close the MPLAB IPE software.
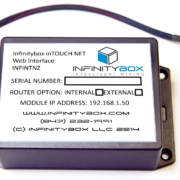
- Connect to the inTOUCH NET server using the Wi-Fi on your laptop.
- Use the SSID and password that came with your kit.
- Launch Google Chrome or Firefox. Internet Explorer will not work for this step.
- Navigate to 192.168.1.50/mpfsupload.
- Hit the browse button that appears on the screen. Select the file with the name that ends in .bin.
- Press the upload button. You will get a message on the screen that confirms that the website was loaded to inTOUCH NET.
- Unplug inTOUCH NET from the USB port on your computer.
- Connect inTOUCH NET to the Infinitybox system. Shut down all power and start up again. Wait 30 seconds for the server to initialize.
- Connect to the inTOUCH NET network with your smart device.
- Browse to 192.168.1.50.
- The initial password to get past security is 123 [ENTER].
Your system is now updated with your new code.
If you have any questions with these steps, give our team a call at (847) 232-1991 or email us at sales@infinitybox.com. You can also contact our team directly by clicking this link.
 Copyright Infinitybox, LLC 2021. All Rights Reserved.
  Copyright Infinitybox, LLC 2021. All Rights Reserved.
  Copyright Infinitybox, LLC 2021. All Rights Reserved.